«Tistory 블로그에서 작성했던 글»
새로 시작한 프로젝트에서 Spring Boot 와 Spring Data Rest 를 이용해서
기존 시스템들의 API 서비스를 구축하고자 한다고 하여,
미리 예습도 해보고 경험도 할 겸 프로젝트를 만들어보았다.
기존에 만들어둔 프로젝트 기반으로 Rest API만 적용 해볼까 생각도 해봤지만,
동일한 환경에서 해야 나중에 헤매지 않을 것 같아서 새로 생성을 했다.
개발환경은 아래와 같다.
1
2
3
 o Language : Java9 (Spring Boot 기본값은 8인듯 하다.)
 o Tools : IntelliJ IDEA
 o DB : H2
처음 프로젝트를 만들고 많이 당황했다.
그냥 클릭 몇번으로 프로젝트가 뚝딱 만들어지다니..
일단 일반적으로 사용하는 모든 툴이 Spring Boot 프로젝트 생성을 지원하기 때문에 생성 과정은 생략하겠다.
프로젝트 생성
o IntelliJ : New > Module > Spring Intializr
o Eclipse : New > Spring Stater Project
** 공통 : Dependency 선택 시 Web, JPA, H2 선택.
최초 생성된 Spring Boot 프로젝트의 모습은 아래와 같다.
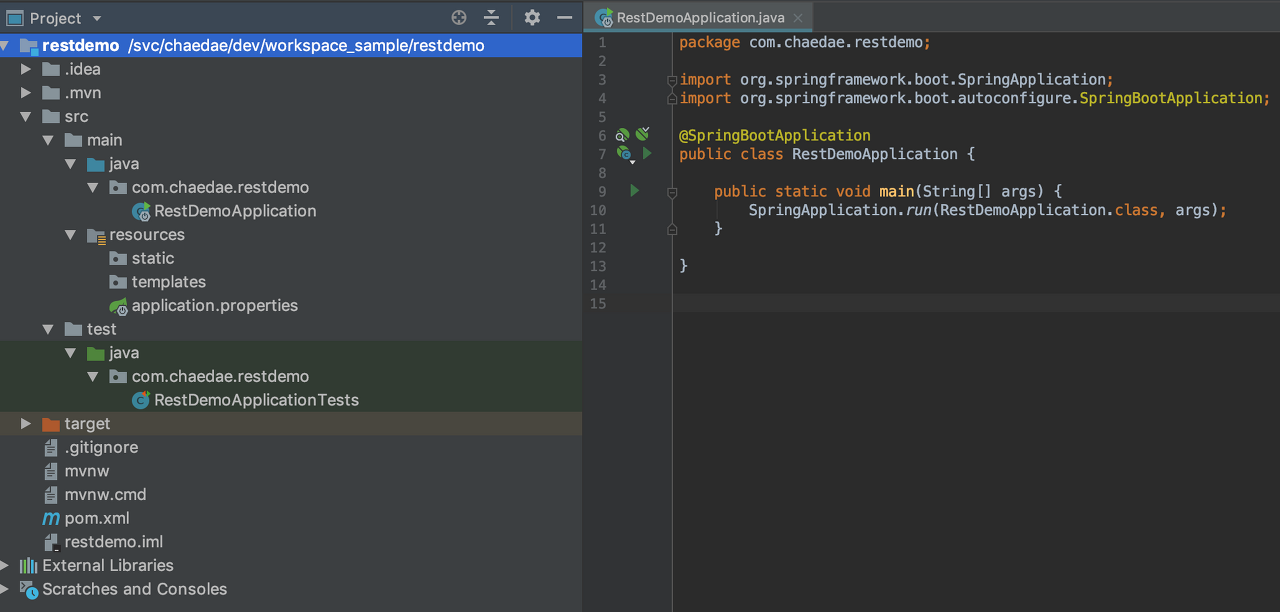
참고로 IntelliJ 버그인지, 내 PC가 이상한 것인지 모르겠지만 얼토당토 않은 오류로 실행이 안되는 경우가 있었다.
어떤 케이스로 처리를 했는지 기억이 가물가물해서 2가지 방법을 다 남겨 놓는다.
1. 프로그램 재시작 후 maven update
2. 프로젝트 우클릭 > Add Framework Support > Spring, Maven 선택 후 빌드
환경설정
프로젝트 생성이 완료되면 RestDemoApplication.java 파일을 자동으로 생성해준다.
생성된 프로젝트에서 내가 만드는 컴포넌트들을 정상적으로 로드할 수 있도록 ComponentScan 어노테이션을 추가해준다.
RestDemoApplication.java
1
2
3
4
5
6
7
8
9
10
11
12
13
package com.chaedae.restdemo;

import org.springframework.boot.SpringApplication;
import org.springframework.boot.autoconfigure.SpringBootApplication;
import org.springframework.context.annotation.ComponentScan;

@SpringBootApplication
@ComponentScan( basePackages = "com.chaedae.restdemo.**")
public class RestDemoApplication {
    public static void main(String[] args) {
        SpringApplication.run(RestDemoApplication.class, args);
    }
}
MVC 구성
이제 Rest 테스트를 위한 간단한 게시판 객체를 하나 생성 해준다.
Post.java
1
2
3
4
5
6
7
8
9
10
11
12
13
14
15
16
17
18
19
package com.chaedae.restdemo.model;

import javax.persistence.Column;
import javax.persistence.Entity;
import javax.persistence.GeneratedValue;
import javax.persistence.Id;

@Entity
public class Post {
    @Id
    @GeneratedValue
    @Column(name = "POST_NO", nullable = false)
    public Long postNo;
    public String title;
    public String contents;
    public String regId;

    Getter / Setter
}
특별한 내용은 없고 Entity 객체를 생성할 때 @Id 어노테이션을 이용해서 Primary Key를 지정하지 않을 시 오류가 발생하니 주의하도록 하자.
이제 저 객체를 핸들링 할 Controller를 생성한다.
PostController.java
1
2
3
4
5
6
7
8
9
10
11
12
13
14
15
16
17
18
19
20
21
22
23
24
25
26
27
28
29
30
31
32
33
34
35
36
37
38
39
40
41
42
43
44
45
46
47
48
49
50
51
52
53
54
55
56
57
58
59
60
61
62
63
64
65
66
67
68
69
70
71
72
73
74
75
76
77
78
79
80
81
82
83
84
85
86
87
88
89
90
91
92
93
94
95
96
97
98
package com.chaedae.restdemo.controller;

import com.chaedae.restdemo.model.Post;
import com.chaedae.restdemo.repositories.PostRepository;
import org.springframework.beans.factory.annotation.Autowired;
import org.springframework.http.HttpStatus;
import org.springframework.http.ResponseEntity;
import org.springframework.web.bind.annotation.*;
import java.util.HashMap;
import java.util.List;
import java.util.Map;

@RestController
@RequestMapping("/api/post")
public class PostController {
    @Autowired
    private PostRepository repository;

    /**
     * 모든 게시글을 조회
     * @return
     */
    @RequestMapping(value = {"", "/"}, method = RequestMethod.GET)
    public ResponseEntity<List<Post>> getPostList() {
        return new ResponseEntity(repository.findAll(), HttpStatus.OK);
    }

    /**
     * 게시글 등록
     * @param post
     * @return
     * @throws Exception
     */
    @RequestMapping(value = {"", "/"}, method = RequestMethod.POST)
    public ResponseEntity<Post> createPost(@RequestBody Post post) throws Exception {
        repository.save(post);
        return new ResponseEntity<>(post, HttpStatus.CREATED);
    }

    /**
     * 특정 게시글 조회
     * @param postNo
     * @return
     * @throws Exception
     */
    @RequestMapping(value = "/", method = RequestMethod.GET)
    public ResponseEntity<Post> getPost(@PathVariable("postNo") long postNo) throws Exception {
        return new ResponseEntity<>(repository.findByPostNo(postNo), HttpStatus.OK);
    }

    /**
     * 게시글 수정
     * @param postNo
     * @param post
     * @return
     * @throws Exception
     */
    @RequestMapping(value = "/", method = RequestMethod.PUT)
    public ResponseEntity<?> updatePost(@PathVariable("postNo") long postNo, @RequestBody Post post) throws Exception {
        Post rtnPost = repository.findByPostNo(postNo);

        if (rtnPost == null) {
            return new ResponseEntity<>(null, HttpStatus.BAD_REQUEST);
        }
        rtnPost.setPostNo(postNo);
        rtnPost.setTitle(post.getTitle());
        rtnPost.setContents(post.getContents());

        post.setPostNo(postNo);
        repository.save(post);

        return new ResponseEntity<>(rtnPost, HttpStatus.OK);
    }

    /**
     * 게시글 삭제
     * @param postNo
     * @return
     * @throws Exception
     */
    @RequestMapping(value = "/", method = RequestMethod.DELETE)
    public Map<String, Boolean> deletePost(@PathVariable("postNo") long postNo) throws Exception {
        Post post = repository.findByPostNo(postNo);

        Map<String, Boolean> rtnMap = new HashMap<>();
        if (post == null) {
            rtnMap.put("deleted", Boolean.FALSE);

            return rtnMap;
        } else {
            repository.delete(post);

            rtnMap.put("deleted", Boolean.TRUE);
        }

        return rtnMap;
    }
}
간단한 조회, 추가, 삭제를 구현했다.
여긴 정말 특별한 내용이 없다.
이제 CRUD를 구현할 Repository도 생성해주자.
PostRepository.java
1
2
3
4
5
6
7
8
package com.chaedae.restdemo.repositories;

import com.chaedae.restdemo.model.Post;
import org.springframework.data.jpa.repository.JpaRepository;

public interface PostRepository extends JpaRepository<Post, Long> {
    Post findByPostNo(long postNo);
}
기본 CRUD에 대한 처리만 할 것이고, 그에 대한 모든 것은 JpaRepository를 상속받으면 모두 처리가 가능하기 때문에 특별한 내용은 없다.
이제 데이터 핸들링을 위해 H2 DB 설정을 해준다.
SpringBoot는 기본적으로 application.properties 파일에 설정값을 넣어주면 프로젝트 구동 시 참조하여 처리를 하는 것 같다.
이 파일의 경로는 src > main > resources > application.properties 다.
application.properties
1
2
3
4
5
6
7
8
9
10
11
12
13
# H2 Console
spring.h2.console.enabled=true
spring.h2.console.path=/h2

# DB
spring.datasource.url=jdbc:h2:mem:testdb
spring.datasource.driverClassName=org.h2.Driver
spring.datasource.username=sa
spring.datasource.password=

# JPA
spring.jpa.show-sql=true
spring.jpa.hibernate.ddl-auto=create
이 역시 특별하게 설명할 부분이 없다.
스프링 부트를 사용하지 않고 환경설정 하던 때와 비교하면 너무 편리하다….
테스트
프로젝트 셋팅이 모두 끝났으니 이제 PostMan 으로 테스트를 해보자.
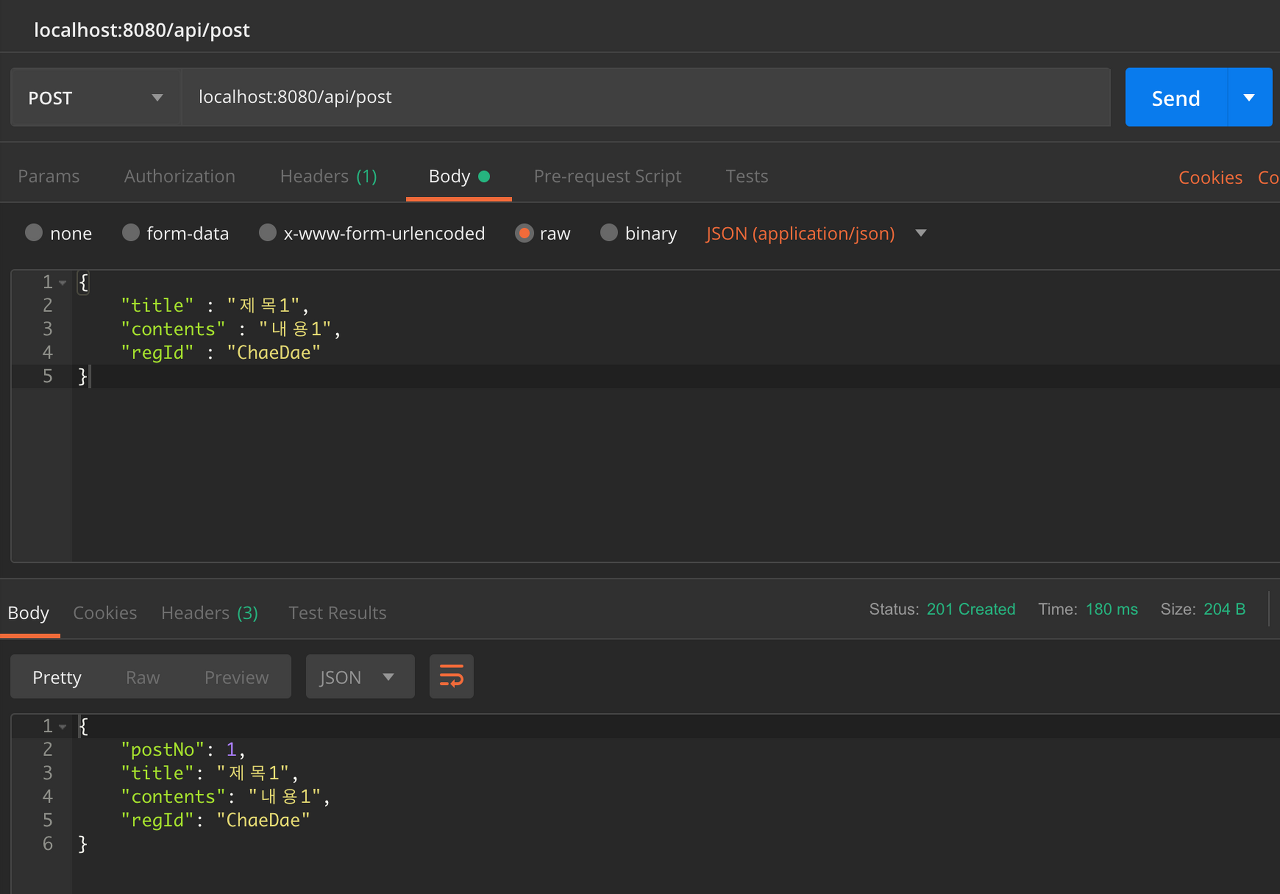
최초 데이터를 밀어넣지 않았기 때문에 데이터를 넣는 것부터 하자.
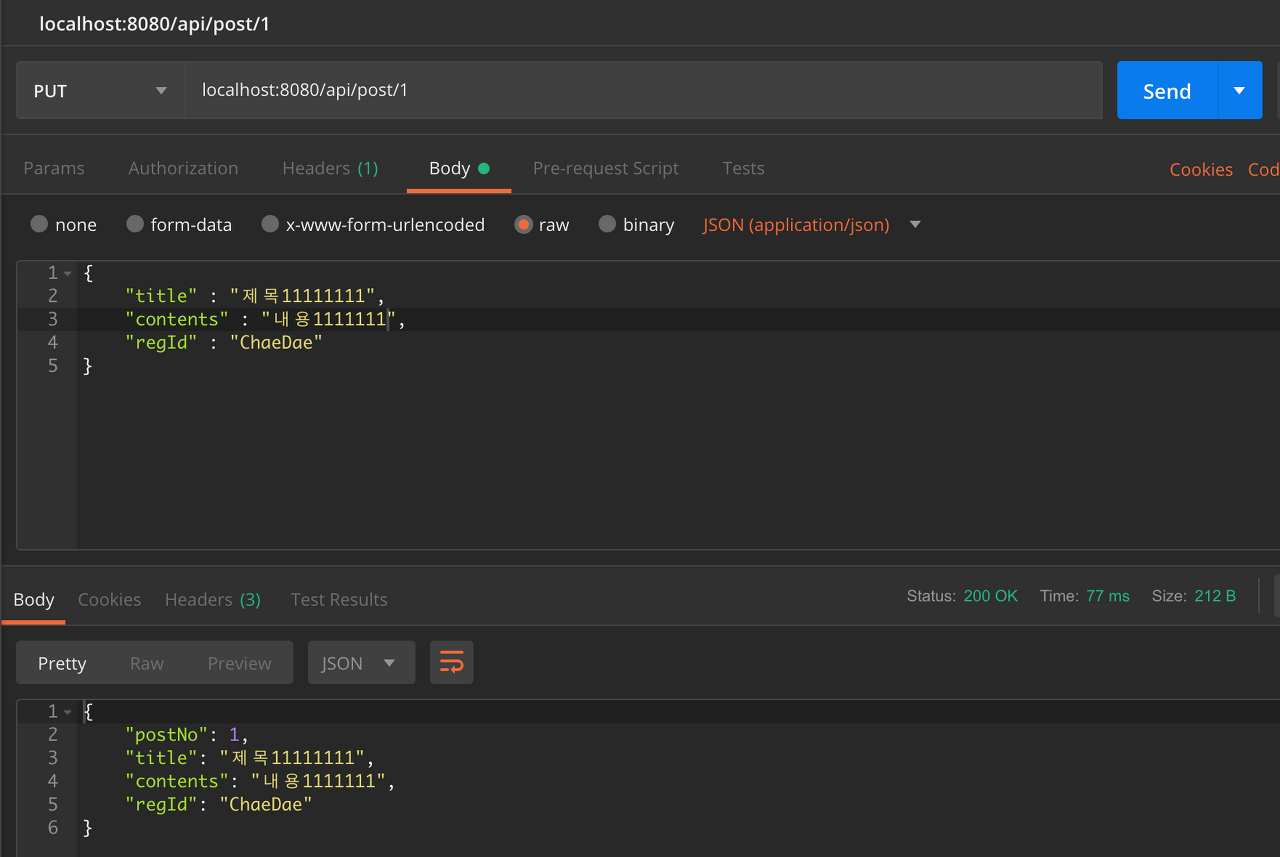
주의할 점은, POST 나 PUT 처럼 JSON 데이터를 넘길 때, Body > raw 클릭 후 우측에서 JSON (application/json) 을 선택 하고 진행해야 한다.
POST (Create) - /api/post
PUT (Update) - /api/post/**
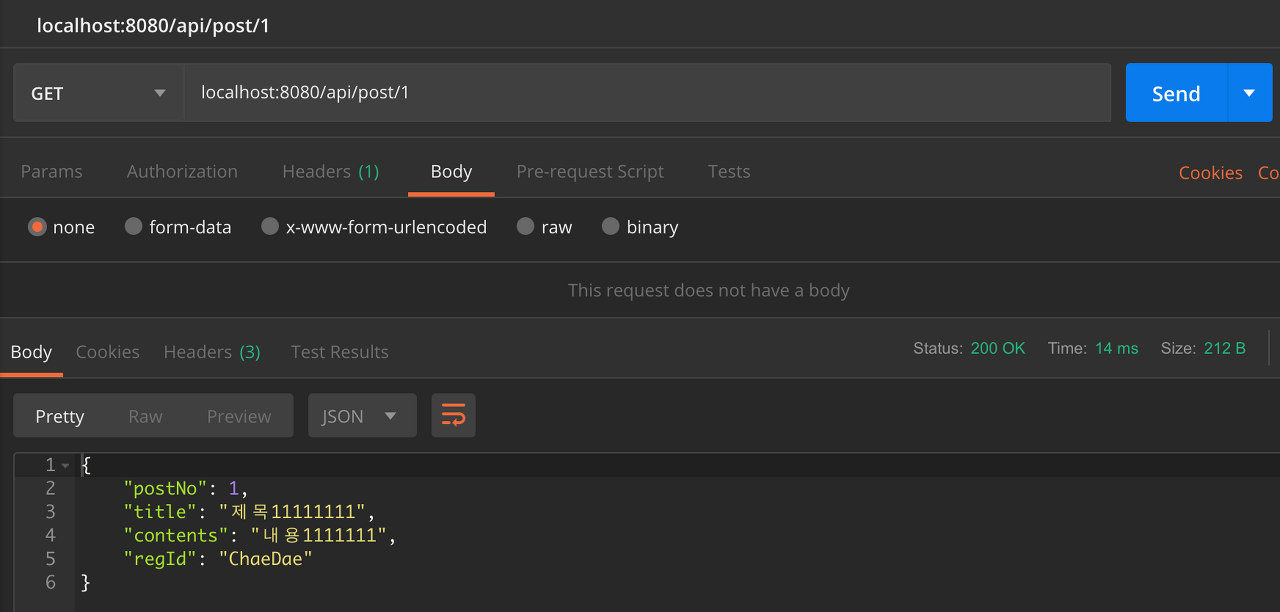
GET (Select) - /api/post/**
GET (Select All) - /api/post**
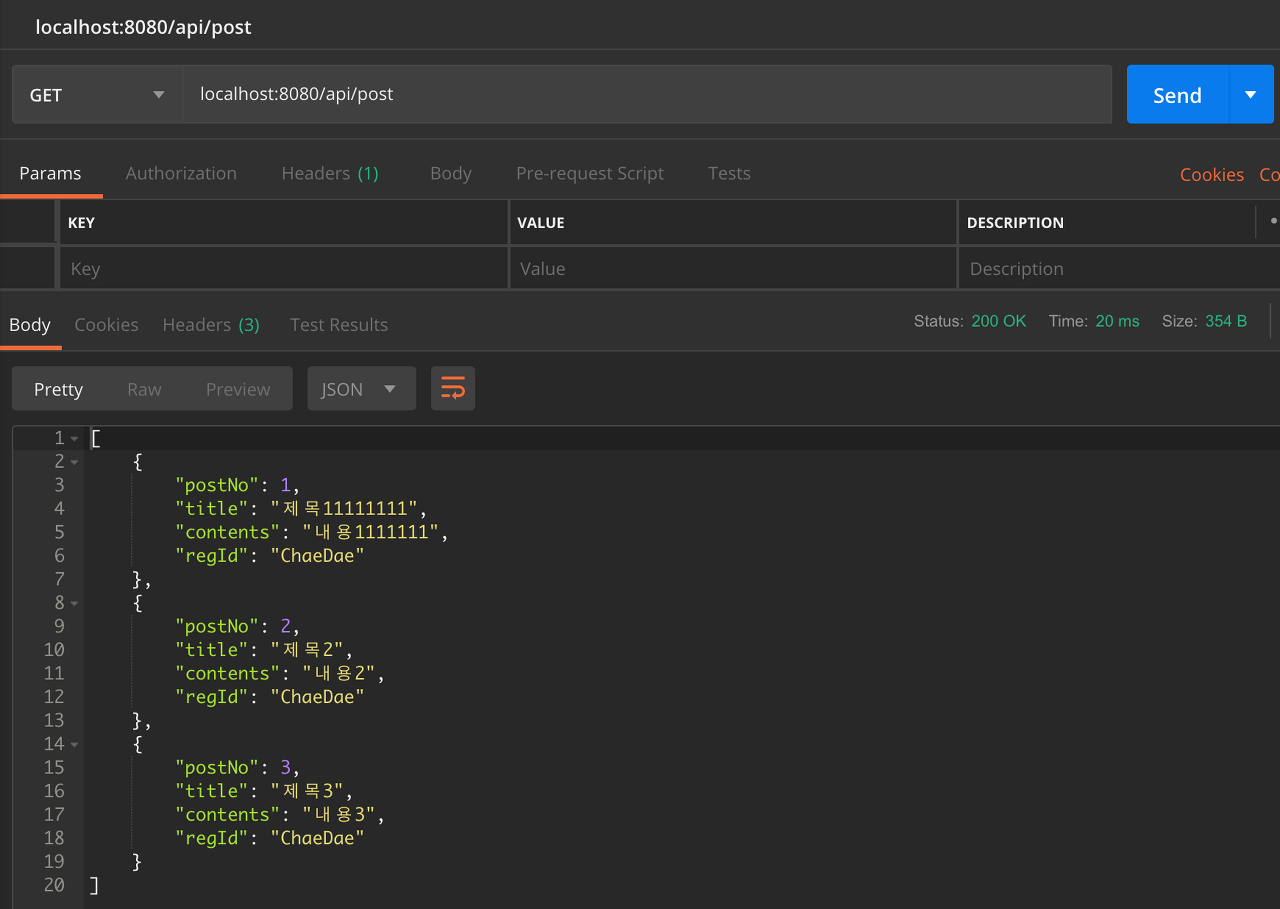
DELETE (Delete) - /api/post/**
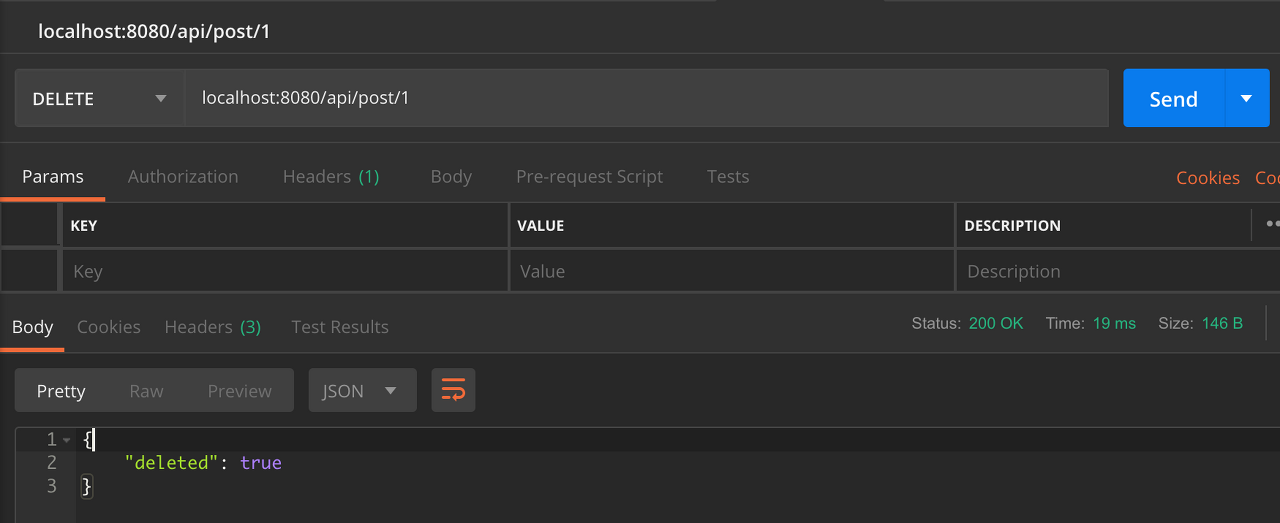
막상 해보니까 Spring Boot 를 찬양하는 사람들이 이해가 되는 프로젝트 였다..
후에 프로젝트가 진행되고 조금 더 깊게 알게 되면 추가 포스팅을 할 예정이다.
해당 소스는 Git에서 받을 수 있다.
:: Git Repo ::
https://github.com/Chaedae/restdemo